Beginner’s Guide to Land Navigation and Terrain Association

In this post I am going to give you some simple tips to increase your land navigation skills. Many of these tips and techniques I have learned through trial and error, or have been taught to me by those trusted NCOs I have served with in the Army.
I will walk you through natural navigation (using the sun, etc), how to identify terrain on a topographic map and in reality, using a compass, determining your pace count, how to determine straight line distance on a map, and the use of GPS and a few reviews of the most popular GPS systems.
Beginner’s Guide to Terrain Association
Terrain association is the comparison of the terrain you can physically see in the real world vs the terrain on a map. You must have a topographic map to see the actual terrain on a map. I am not talking about just roads and exits like you would find on a road atlas, I am talking about hills, ridges, etc. The remainder of this article will focus on topographic maps and major terrain features…
What is a Topographic Map?
The major difference between a topographic map (henceforth I will call them topo maps) and a regular road atlas style map is the addition of contour lines which allows a skilled reader the ability to see the shapes of the Earth’s surface. You can get topo maps from your local forestry station, or printed and laminated maps from Mytopo.com.
For this post I recommend going to MyTopo online maps and viewing their free online topo maps of your area and pulling up your house to follow along. You can also click here to build a custom map, and have My Topo print and laminate a map for use on the trail or in the field. They even have imagery available for purchase. The map above is a printed map from mytopo, which also includes a hiking route…they have 1000s to choose from, so check it out.
What is a Contour Line?
Contour lines are usually brown in color on a map and follow the natural curvature of the Earth, like a path…they also maintain the same elevation along the line.
There are two main types of contour lines: indexed and intermediate.
Indexed contour lines are darker in color and somewhere within the line the elevation in meters will be noted.
The intermediate contour line is lighter in color. There are four intermediate lines between each set of indexed lines. The elevation difference can be found in the margins of the map, called the contour interval.
It is usually 20 meters difference between the intermediate lines and 100 meters between indexed lines. In the example to the right you can see an indexed contour line at 1200 meters, then the next at 1300 meters.
The intermediate lines in between represent a 20 meter elevation change. Next, I will discuss how to use these to identify terrain.
KEY TAKEAWAY: The closer together contour lines are, the steeper the terrain in real life.
What is a terrain feature and why do I care?
There are several terrain features that can be found on a topo map. These will allow you to locate major landmarks which can guide you in the right direction if you become disoriented, or they can merely confirm you are travelling in the right direction.
HILLTOP – can be easily identified by a circle in the contour line, see the example above. A hilltop is an area of high ground, the ground slopes down in all directions.
This is what a hilltop looks like in real life.
RIDGE – A sloping line of high ground, a line that connects two hilltops. This is what a ridge looks like in real life.
VALLEY – A stretched-out groove in the land, usually formed by streams or rivers and located at the base of a hill
This is what a valley looks like in real life.
SADDLE – A dip or low point between two areas of higher ground
This is what a saddle looks like in real life.
SPUR – A short continuous sloping line of higher ground, normally jutting out from the side of a ridge. Normally formed by parallel streams cutting down the side of a ridge. PRO TIP: Contour lines shaped like Us or Vs point AWAY from high ground.
DRAW – A less developed stream course than a valley. There is no level ground, therefore little to no maneuver area within it’s confines. Usually occurs between two spurs. PRO TIP: The Us or Vs of the contour lines point uphill and upstream.
This is what a draw looks like in real life.
Fist Terrain Features
You can use your fist to summarize a lot of the features, just make a fist and take a look at the picture above to see the saddle, spur, draw, ridge, and hilltop.
Terrain Association: Next Steps
Now that you understand terrain features and how to identify them on the map, take a day and go for a short hike. Use a topo map and try to identify terrain features on your map and in real life. BAM! now you are doing terrain association. You can use terrain association to confirm your location as you move or you can use it to try to find your location on the map by just looking around and identifying terrain features around you. If you get disoriented, take some time to find your surroundings on the map and you should be able to figure out where you are on the map. In the next section we will talk about the compass, which will increase your ability to navigate with a topo map.
Lensatic Compass Vs Baseplate Compass
Prior and current military will typically choose the lensatic compass over the base plate compass simply because that is the issued compass and what we are most familiar with. I will discuss each over the next few paragraphs and describe the pros and cons of each.
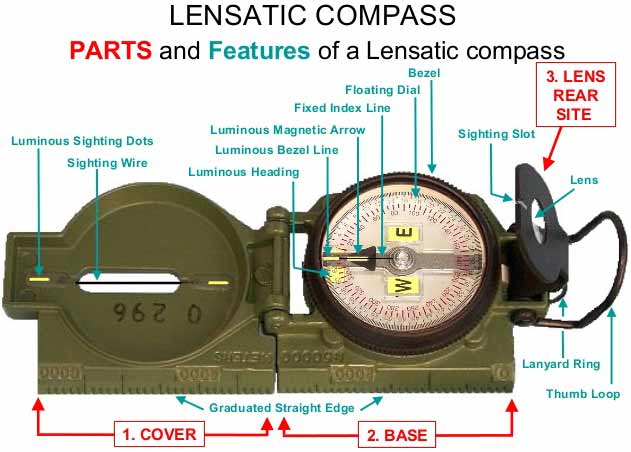
The Lensatic Compass
The biggest advantage of a lensatic compass over a baseplate compass is the lens that allows you to sight in a landmark or navigational target while simultaneously seeing exactly what the bearing is to the target.
This is particularly useful when you shoot an azimuth, and want to be dead on. The lensatic compass will always weigh more than a baseplate compass but if you are not too concerned about ounces, take a look at both compass styles and make your own choice.
The lensatic compass has many parts but don’t get overwhelmed, its really simple to use once you master a few basics. Theses also come in two night variants the phosphorescent (which charges glow strips with light) and the tritium (which is a radioactive material that will glow for about 12 years).
These can be beneficial in low light conditions without a flashlight. The tritium version usually cost a little more than phosphorescent. I use the CMMG Tritium, click here to check latest price on Amazon.
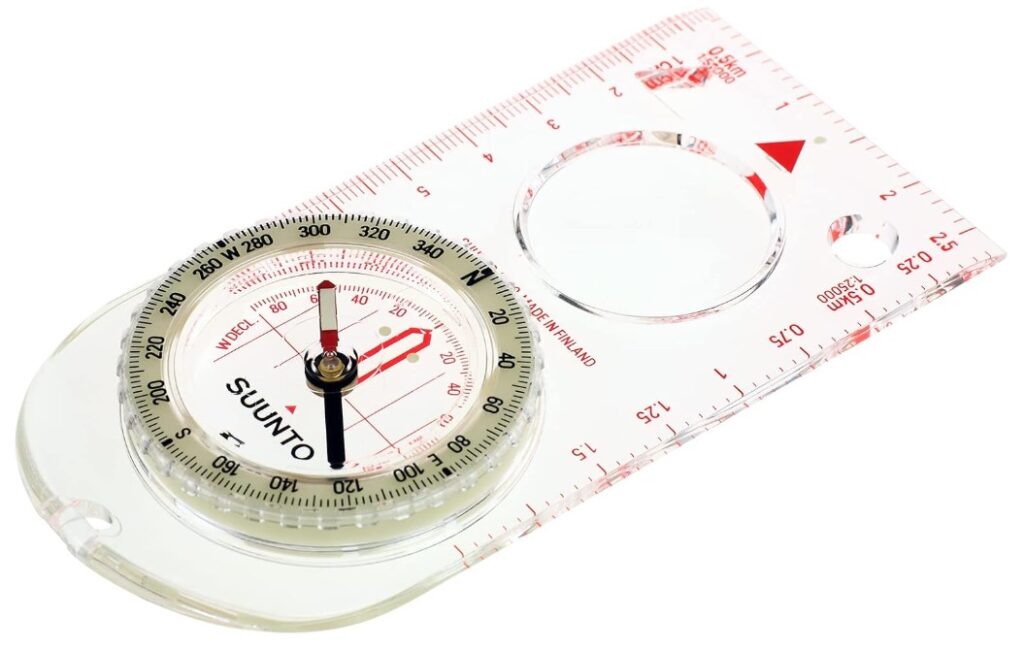
The Baseplate Compass
This compass is much cheaper than the lensatic compass, and is used by simply pointing in the general direction of the heading or bearing and “eyeballing” the next landmark.
It weights about 2 ounces, and is usually the preferred model for backpackers due to its ease of use and light weight. Click here to check latest price on Amazon.
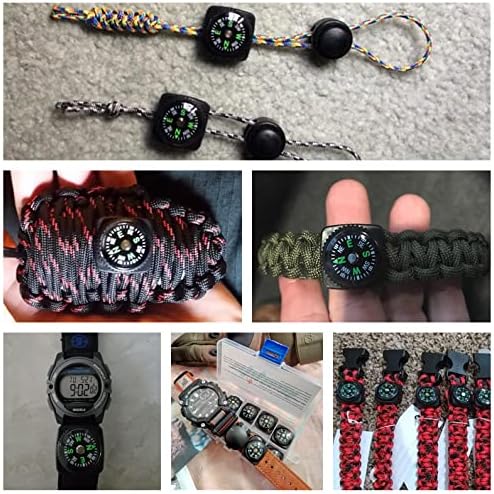
The Button Compass
The button compass can be had for about a buck and are great to lace into your boot, or hide-a-way in your ruck or pack. I have also seen these made into paracord bracelets and on the top end of a hiking stick.
Though it doe not include degrees for shooting an azimuth it can save your life when all other methods fail. At the very least it can show you the 4 cardinal directions. Click here for latest prices on Amazon.
How to orient your map with a lensatic compass and a topo map
The first thing you want to do is orient your map to north. To do this simply place your compass on the map and rotate the map until it is pointing north alongside your compass pointing north. Now you have oriented your map. If you see a hilltop on your right in real life you should also see a hilltop to your right on the map! It really is that simple. Now if you find your location on the map you can use your oriented map to identify terrain features, and travel in the right direction based on the terrain you see and the general direction from your compass.
How to determine straight line distance and route distance on a map
The first step in this process is to locate two points that you want to know the distance between. Once you have that, take a piece of paper and make small tic marks along it to mark distance.
Once that is complete compare the tic marks to the scale found on the map. That is it for straight line distance.
For route distance you are going to do the same thing, but you will move the piece of paper at differing angles along the curves in the route to record the tic marks to ensure you get all the curves in the trail accounted for.
Then compare the paper to the scale, and you have your route distance.
How to determine your pace count and use it to measure distance on the ground
Your pace count is how many steps it takes you to travel 100 meters. This is beneficial when you are wanting to measure your progress on a map, to determine how far you have been, and how far you have left to go.
To determine your pace count mark off 100 meters in your backyard or somewhere free of debris and brush.
I like to use a 100 meter strand of 550 cord for this purpose. Next start with your right foot, and count each time your left foot strikes the ground, until you get to the 100 meters.
Write this number down and walk the line at least twice more. Now add all three together and divide by three to get your average, unobstructed pace count. This will be your pace in this type of terrain.
The tricky thing about pace counts is that they will change based on several variables: dense vegetation, sand, mud, tall grass, uphill, downhill, daytime, and nighttime.
Try to simulate the environment you are going to be operating in and get your pace count in that environment.
Don’t lose count! By only counting the left foot you reduce some of the change of losing count, but if you have a long distance that needs to be measured try tying a knot in a piece of 550 cord every 100 meters, or if you have 800 meters to go pick up 8 pebbles and drop one every 100 meters until you run out.
You can also purchase “ranger beads” which will work similar to a simplified abacus.
Natural Navigation: Using nature to find your way
The Shadow Tip Method
This method works well but does take about 30 minutes to complete.
- Step 1. Take a stick that is about 3 feet long and stick it straight up in the ground. The sun will cast a shadow on the ground of the stick, mark the tip of the stick, with a pebble or something. This is your west mark.
- Step 2. Wait 15-30 minutes until the tip of the shadow has moved, and mark this location with another pebble. This is your east.
- Step 3. Draw a line between the two marks.
- Step 4. Stand such that the first mark in on your left, and the second mark is on your right. You are facing north., and south is to your rear.
This method works the same in either Northern or Southern Hemispheres.
Follow the Water!
If all else fails, and you failed to tell anyone where you will be hiking, and know no one is coming….find a stream and attempt to follow it out of the wilderness and into a town or larger river.
The only issue is that sometimes following a stream or creek can lead you to an impassable obstacle like a waterfall or a cliff. If you can get to high ground you may be able to see that cliff or waterfall before you spend days hiking to arrive there.
Also following a stream ensures you have plenty of water, and prevents you from walking in circles.
I have a GPS…I will never get lost again!
This is the mantra of many new hikers and Soldiers. Unfortunately, this is not the case. Stuff happens…batteries die, GPS’s get lost or smashed, and if in a combat zone the enemy can jam GPS signals. The GPS is not a new invention it actually was invented for the military back in 1973 by the Department of Defense. It has come along way since then, and now systems can fit on your writ or in a pocket.
When you first purchase a GPS you need to read the manual and learn how to use all the features. The next thing I would do is watch some instructional YouTube Videos about how to use the system. Lastly get out in a familiar area and practice using the GPS before you go into unfamiliar territory. Lastly, make sure you still carry a map and compass!
I couldn’t tell you how many times in the Army a new LT or NCO become so complacent and reliant on their GPS then it gets jammed or broken and they are struggling with their map and compass to figure out where they are or where the next objective is located.
GPS Buying Tips
Touchscreen vs Buttons:
GPS systems basically come either with buttons or with a touchscreen. Button systems tend to be more rugged, have a better battery life, and are more suited to freezing temperatures due to the fact that touchscreens can lockup and are hard to operate with gloves. Touchscreens usually react faster and have better map displays.
Communicating with a GPS:
A GPS with a built-in radio transceiver is very helpful if you have several people in your party. You may want to divide up into ability groups and hike at different paces. The Radio will allow you to maintain communication between the groups, for an afternoon link up or warn the trail party of obstacles they may encounter.
There is also a new feature called location sharing that allows other users of the same model GPS to share their location with you and vice versa. Again this is helpful for parties traveling at different times on the same trail. Also useful in a field environment for finding other elements of your force. Be careful though, the enemy can hack these locations and hone right into your “shared” location.
Battery Life:
Battery life is also important as well as what type of batteries the unit takes. Rechargeable batteries are great if you have a way to recharge the unit on the trail or in the field otherwise you will just have an expensive paperweight when the battery runs out. A GPS unit that uses interchangeable AA or AAA batteries would prevent you from having to purchase or pack a charging unit of some type.
GPS Reviews
Garmin Foretrex 401
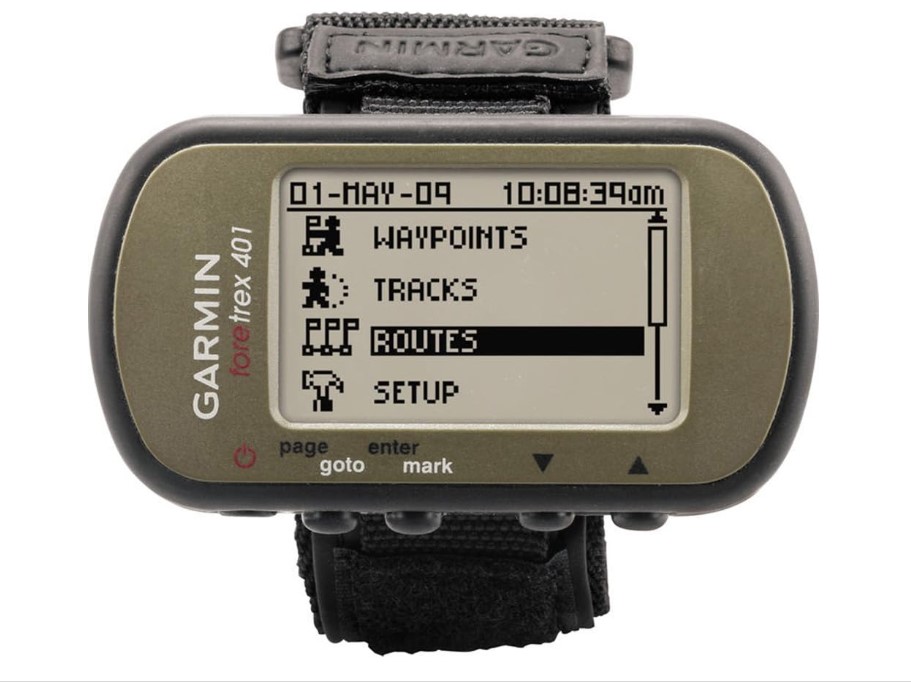
The GPS I use in the field is the Garmin Foretrex 401. I like it because it is small (you can mount it to your wrist or kit, virtually bombproof, waterproof, accurate which is basically everything I need it to do. I always have a map and compass so I normally only use the GPS to track my current location. you can also input coordinates into it and it will plot straight line distance and act as a “homing” device to that location. It also features a well-designed compass w/ azimuth readout, altimeter, and has sunrise/sunset times. It runs off of 2x AAA batteries which will last about 15 hours. Click here to check the current price on Amazon.
Garmin Oregon 600t
This is one of the more popular touchscreen GPS systems. It features a compass with azimuth, 3-inch touchscreen, barometer, altimeter, Bluetooth, can share routes and current location, and can run off 2x AA batteries or rechargeable batteries. It also has the option of adding an 8 MP camera for about $50 extra. Click here to check the latest price on Amazon.
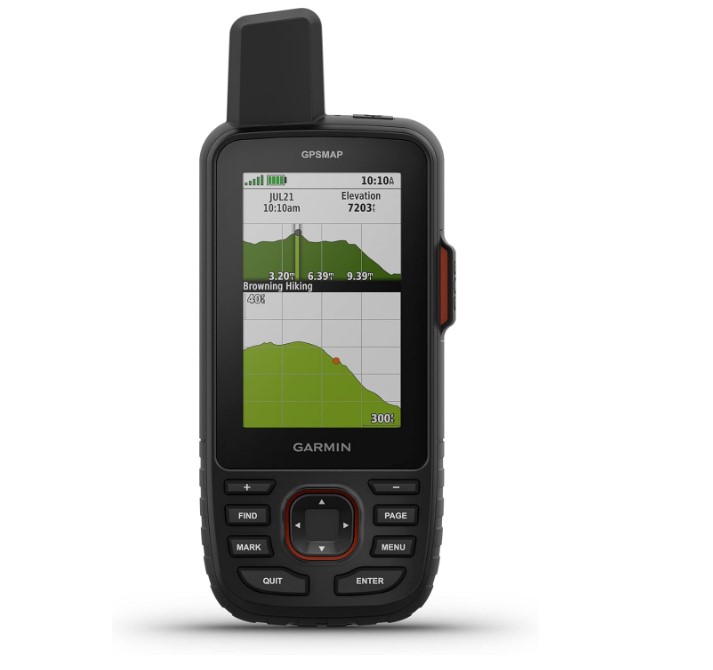
Garmin GPSMAP 64st
This is the most popular button driven GPS system. It features a compass with azimuth, altimeter, barometer, 2.6″ screen, 100K topo map for US and Canada included, and 16 hours battery life via 2x AA batteries or rechargeable batteries. Click here to check the latest pricing from Amazon.
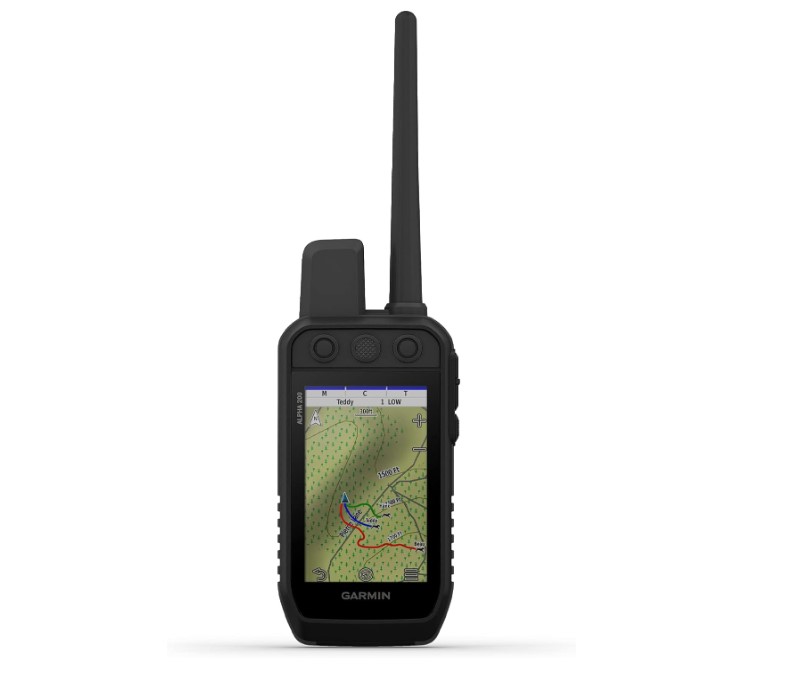
Garmin Rino 650t
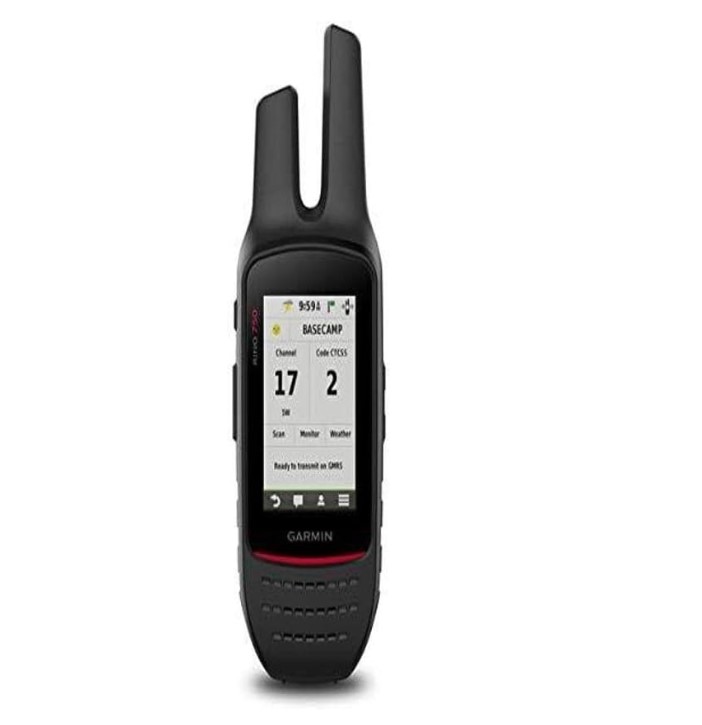
This is THE GPS to purchase if you want an integrated radio transceiver. It comes with GMRS which can talk to other GMRS radios up to 20 miles. It has a glove friendly 2.6″ touchscreen, 100K pre-loaded maps, compass with azimuth readout, barometer, altimeter, 14 hour batter life, but only via an internal rechargeable battery. It also allows you to send your exact location to other Rino GPS systems allowing the other user to see you on the map. Click here to check the price on Amazon.
In Summary…
We have discussed terrain association, how to get your pace count, how to orient your map, how to determine North if your compass and map get lost or destroyed, and some key features of GPS, as well as a few reviews of GPS. Please comment below with any questions and I will do my best to give you a good answer!